Whether for your wedding, prom, or another event, a corsage enhances the appeal of those who wear it. Not to be confused with a boutonniere. It complements formal attire and the flowers adorning it, making a lasting impression on those who look at it. Make your corsage any way you like to maximize its appeal with this complete step-by-step guide. You will learn everything you need to know here in our blog, how to make a corsage with flowers, to start making your DIY corsage including…
*What Is A Corsage?
*How To Envision Your Corsage
*Tools And Supplies You Will Need
*Best Flowers For A Corsage
*Best Accessories For A Corsage
*Best Greenery For Your Corsage
*Assembling Your Corsage
Table of Contents
ToggleWhat Is A Corsage?
When discussing how to make a corsage in our blog, how to make a corsage with flowers, we must talk about what a corsage is. Corsages come in different forms and sizes. It all depends on where the woman will be wearing it. A corsage can be a broach, a single large lightweight flower, or a small composition of greenery and seeds.
Related: Read more of my blogs to learn every minuscule intricacy of artistic nuisances there are in designing perfection.
They can include flowers and greenery that are fresh, dry, or preserved. It’s designed with flowers, twigs, or any other items that are not heavy because it will be pinned on the chest, shoulder, or worn on the wrist or arm. In modern times, the corsage is still pinned on the left-hand side of a women’s chest, shoulder, or worn on the left-hand side of the wrist or arm. There is no rule, but you can go for what is comfortable for your clients.

Corsages are suitable for weddings, proms, quinceañeras, baby showers, mother’s day, special dinners, engagement parties, and other special occasions. In some cultures, every female guest gets a corsage, and in other cultures, corsages are just for the closest family members.
You can be creative and come up with your own personalized style.
Get inspired by jewelry, accessories, fashion, or anything that caught your attention. You do not have to follow any trend. This is the moment to experiment and be yourself. Be sure to practice at least three months prior to your big day so you do not stress out if it doesn’t look the way you wanted.
See More:
-
How To Make A Beautiful Boutonniere With Real Flowers Quick And Easy In 4 Straight Forward Steps
-
How To Make A Phenomenal Flower Arrangement Step By Step Quick And Easy In 6 Easy Steps
How To Envision Your Corsage
Think about the occasion, outfit, weather, venue, hobby, favorite color, the flower you like, or a brooch you always wanted to wear. Do you want to have a traditional wrist corsage, a modern arm corsage, a shoulder corsage. Do you want it smaller or do you want it to be a statement piece. Do you want it to have an essence, or are you allergic to flowers with aroma?
Related: My blog complete guide on selecting a bridal bouquet.
You can personalize it with items that mean something to you, such as jewelry from your grandmother, a diamond, or an exquisite baccara crystal.

Tools And Supplies You Will Need
If you are making a modern shoulder corsage, these are the tools and supplies needed.
- Hot glue gun
- Glue stick
- A piece of marble or any non-sticky surface
- Cool glue
- A spray bottle with water
- Textured greenery
- Small flowers
- Flower seeds
- Crystal or pearl strands
- Shrinkwrap
- Accessories

Best Flowers For A Corsage
When learning how to make a corsage with flowers you must know which flowers are best to work with in your corsage. Here are many flowers you can use in your design…
- Spray or sweetheart roses. These flowers are small and not heavy, and therefore are great for corsages.
- Hanging amaranthus, this flower gives the corsage a romantic and mystical look and adds movement to it.
- Orchids are one of the favorite flowers for corsages for their beauty and their light weight.
- Carnations. Using this flower in your corsage will elongate the fresh look of the flower because it is a hardy flower, and it will stay looking beautiful even without any water source.
- Seeded eucalyptus. This is an intricate touch for the corsage. It is a filler, and therefore it adds movement and drama.
- Pepper berry. If you like pink with a touch of green, then this is the perfect addition to your corsage. It’s also a lightweight filler.
- Ranunculus. The petal count and form is impressive. Even if it looks so delicate, it is a hardy flower and lasts very long.
- Succulent. Even though it is not lightweight, it lasts longer. You can choose the more miniature succulent or decompose it and glue it to your corsage.
- Daisies. This flower is used more for country rustic weddings.
- And any flower that can stand to be out of the water and still look amazing.
If you want more inspiration on flowers, then be sure to visit my blog where I share my top recommendations for flowers.

Best Accessories For A Corsage
Now that we are learning how to make a corsage with flowers, we can talk about accessories. You can embellish your corsage with pearls, crystals, delicate fabric ribbon, greenery, decorative pins, a piece of jewelry, or anything that looks good for you and is not heavy.
Related: My blog how to make your own flower arrangement.
You can add small strands of crystals or glue tiny crystals to a few areas in your corsage. You can also remove the lace from your grandma’s handkerchief and tastefully incorporate it within the corsage.

Best Greenery For Your Corsage
Below are a few of my favorite greenery for corsages. The greeneries I am recommending here are very hardy, so they will also last longer. They look great in smaller designs such as corsages.
Related: My article buyer’s guide for flowers.
- Italian ruscus
- Ruscus
- Any dedicated fern
- Pepper berry leaf
- Variegated pittospurum
- Silver dollar eucalyptus
- Cocculus
- Podocarpus
- Willow

Assembling Your Corsage
Let’s discuss how to assemble a corsage in our blog on how to make a corsage with flowers. Have a plan ready of what form you want to give your corsage. If you are making a modern wire-free corsage and using hot glue as the mechanics, then a non-stick surface will be necessary. You still need to spray some water to ensure the hot glue will not stick to it.
Instructions:
- Put the glue stick in the hot glue gun and plug it into an electrical source
- Get the spray bottle with water and spray the surface where you will be making the form of your corsage.
- Get the glue gun and start designing the corsage form with the glue. Make sure it is not too thick if you leave a few areas exposed. Suppose you plan to fill all the glue base with flowers, thus making the mechanic thicker is better. It is important to have a good mechanic. Make sure you do not leave large holes because you will need enough area to glue your flowers.
- Let the glue cool down then use cool glue to add the flowers, greenery, and accessories to the base. Start with the greenery, follow with the largest blooms, and finish it with the filler flowers. If you plan to add other accessories, then this is the time to accessorize it. I recommend gluing the flowers, greenery, and further details with Bacon Fabric Tac Permanent Adhesive because it fast grabs, or adheres it, and dries quickly. It will not melt the glued structure made earlier.
- Once the corsage is finished, try it in to see how it looks. Pin it on your shoulder with corsage pins
- If you are satisfied, then take the corsage off your shoulder and use the spray water bottle to mist it. Get a plastic box with a cover, put a wet paper towel in the box, place your corsage in the box, place another layer of damp paper towel on top of the corsage, and put it in the cooler. You can make the corsage a day or two before or the night prior to the event.
Let’s try another example of a corsage reinforced with wire using aluminum wire as the armature and put together with adhesive floral corsage tape. This corsage is to be worn on the arm.
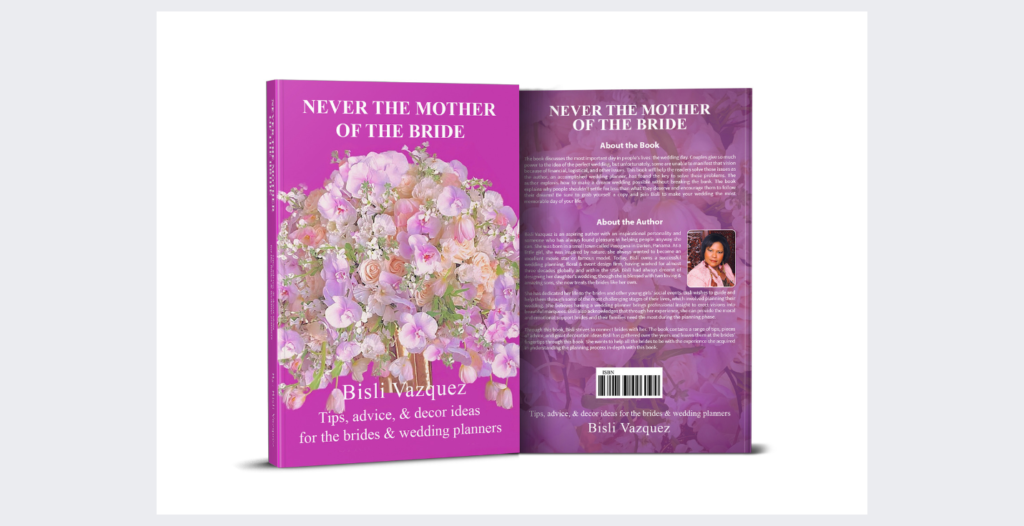
Related: My book, now on amazon, “Never The Mother Of The Bride” featuring David Tutera.
For this project, the tools and material you are going to need are below.
- A sharp scissor
- Two feet of gold aluminum wire
- 32 gauge wire
- Wirecutter
- Corsage adhesive tape
- Beacon fabric glue
- A sharp floral knife
- Small flowers already hydrated, such as three spray roses, a stem of Italian ruscus, two stems of mokara orchid, two stems of german statice, a bit of deer moss, and three florets of phalaenopsis orchid.
Let’s put this arm corsage together. First, measure how high the corsage will go on the arm, then cut the aluminum wire to your decided length. Cut the spray roses’ stems. It must be very short at about one-inch maximum. Cut two stems of mokara orchids at about three inches each, and the other stem at one and a half inches.
The filler flower, german statices, should be cut at two and a half inches and one at one and a half inches. Wire all these flowers separately with the thirty-two gauge wire and individually tape their stems. Tape the mokara orchids with the german statice, then add the spray roses and add a touch of Italian ruscus.

Cut the stems of the florets of the phalaenopsis orchids to one inch, add the thirty-two gauge wire through the orchid’s throat, and tape the stem and wire with adhesive floral tape. Attach the mini bouquets of the sweetheart roses, german statice, Italian ruscus, and mokara orchids to the gold aluminum wire using the adhesive tape.
Related: Our flower arrangement online courses. In both English and Spanish
To reinforce it, add a drop of beacon fabric glue. Attach all the mini bouquets to the gold aluminum wire leaving at least four inches in between to connect the phalaenopsis orchids with the Italian ruscus using the same adhesive tape and securing it with a drop of bacon fabric glue.
You can cover the adhesive tape with a touch of deer moss or the leftover flowers and greenery. Once this part is done, then it is time to give form to the arm corsage. Make a loop in one end, insert the ring finger, and secure it so it stays in place. Now carefully wrap around the arm of whom will be wearing this flower the gold aluminum wire. Make sure it is tight enough so it won’t move.
Remove the wire, store it in a plastic box with white wet tissue paper, and place the arm corsage. Now get another layer of damp white tissue paper and place it on top of the arm corsage to keep it hydrated. Put the lid on the plastic box and store it in the cooler.
See More:
Conclusion
That concludes our blog on how to make a corsage with flowers. Now that you have everything you need and know how to start making your DIY corsage, it is time to practice. You can begin by customizing your corsage in any way you like to maximize how stunning it looks. Remember to practice to improve the appeal of your designs. Be sure to study more to learn the small techniques that bring out the beauty of your designs. Check out our other blogs to learn as much as you can to amplify the look of your designs.
Related: If you are looking for event planning services and rentals, contact me at bisli@bisli.com.
About Me
I am the CEO of an event service firm, Bisli Event Services LLC. I am also a published author of my book “Never The Mother Of The Bride”. With an introduction by the world-famous David Tutera, star of the hit show My Fair Wedding on WE Tv.
I also am the author of multiple floral arrangement decor courses online. I’ve been featured on Platinum Weddings, Top Chef on Bravo, Platinum Weddings on WETV, CNN, CNN Latino, MTV Latino, San Antonio Weddings Magazine, kens5, and The Knot.
I have been a Wedding planner, floral designer, event designer, speaker, and Luxury celebrations coach for almost three decades. I have also done events for celebrities such as Barack Obama.
Thank you for checking out my blog. You will enjoy your event much more filling your time up educating yourself on the various topics surrounding event design. We have even more content for you to enjoy and learn even more tips about event design and decor.
My office is located in San Antonio Texas. If you have questions about booking please contact me at bisli@bisli.com. We offer event planning and decor services.
Best of luck to you in your event decor and planning endeavors. See you on the next blog.


